Using the Form Library
The Form Library is the central repository for all your Forms. It is where Users (with the appropriate permissions) build and manage the Forms in your account.
Global Forms and Project Forms
When you view your Form Library, you will notice that there are two groups in the folder list:
- Project Forms
- Global Forms
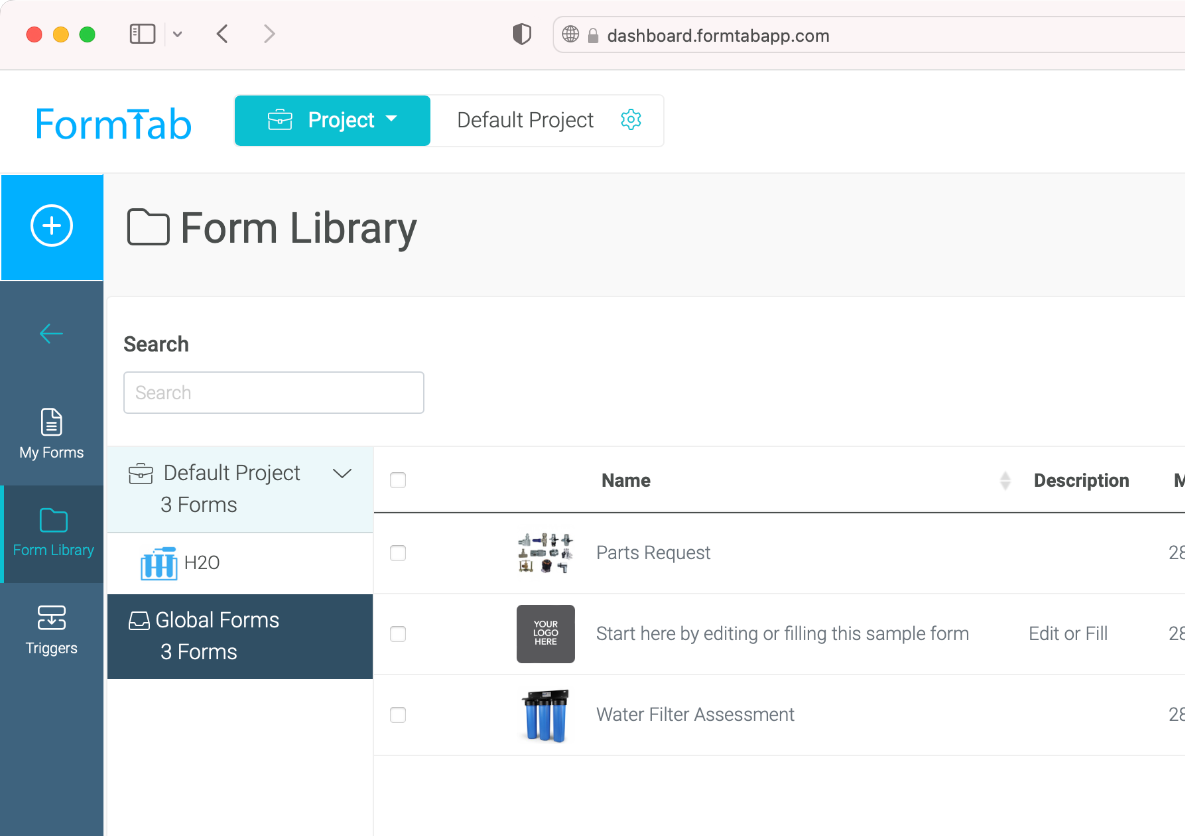
You can use these groups to quickly view and manage the Forms throughout your account.
Global Forms
This group shows all the Forms that exist in your account. Only Account Administrators can view and access this group.
Project Forms
Select the Project Forms group to show all the Forms that have been added to the currently selected Project. If you have multiple Projects, you can select a different one by using the Project Switcher at the top of the page.
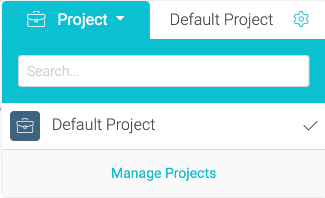
- The Project Forms group can be viewed and accessed by Account Administrators and Admins of the current Project.
- Click the disclosure triangle next to the Project name to show a list of all the Teams in your Project
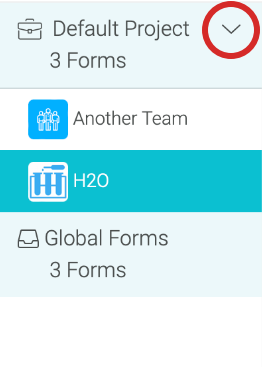
- Click on a Team to display all the Forms that have been added to that Team
TIP
See Publishing a Form for more information about adding Forms to Projects and Teams.
Creating a Form
To create a new Form, click the Create a New Form button at the top of the page.
This button is only visible to:
- Account Admins
- Project Admins (if the Project is configured to allow new Forms)
When a new Form is created, it is saved in either:
- The Global Forms group, if the Form is created by an Account Admin, or
- The Project Forms group, if the Form is created by a Project Admin
TIP
Check out Managing Projects for more on allowing Project Admins to add new Forms.
Check out The Form Builder guide for a detailed look at building Forms.
Changing a Form
If you need to change a Form, you can safely do this at any time.
- Select the Global Forms group in the Library folder list
- Find your Form in the list, click the Actions menu and select Edit Form
- A Draft copy of the Form is created, so you're free to make changes without affecting your Users
- After you've saved your changes, your Form now displays an icon to indicate it has pending changes
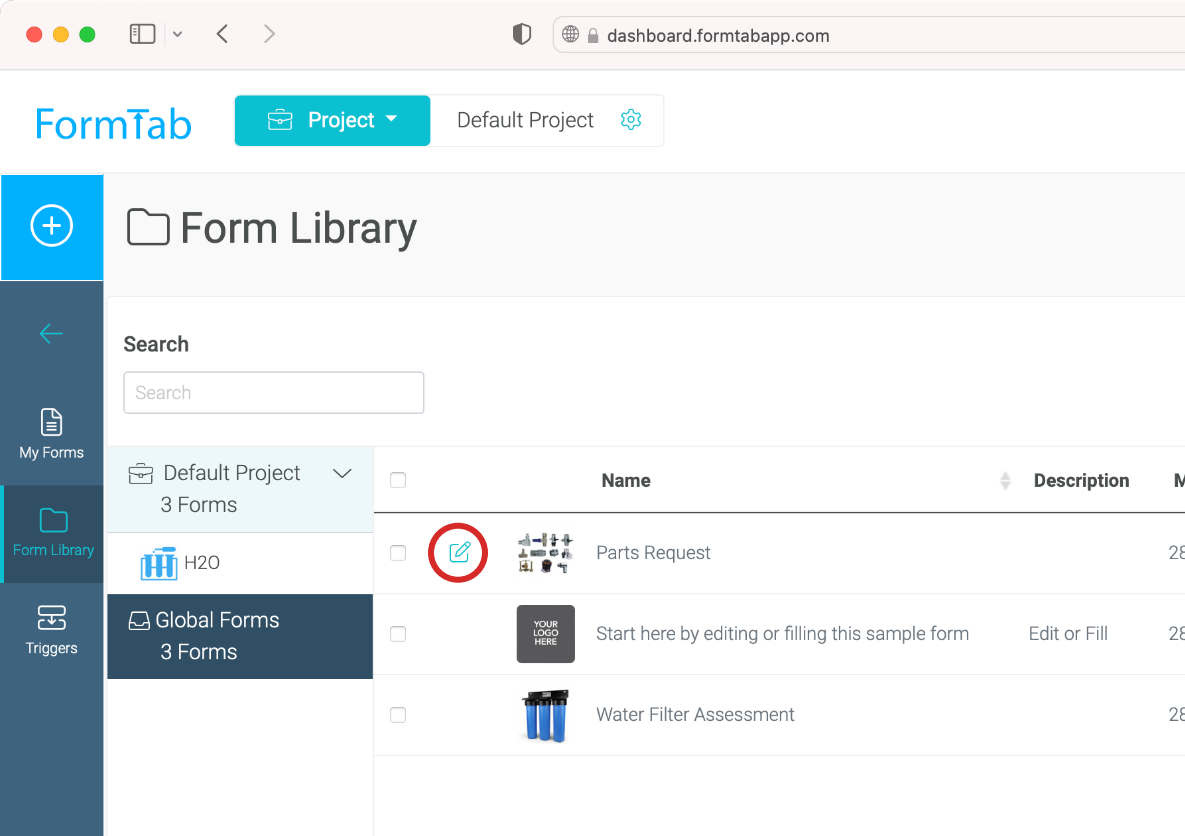
- When you're ready to publish your changes, click the draft icon and choose Apply Changes from the options that appear. The published Form will now be updated with the changes you have just made.

Publishing a Form
To make a Form available for your Users to fill, it must be published to a Team. To do this:
- Add the Form to the Project that Team belongs to, then
- Add the Form to the Team
One Form can be used in multiple Projects and Teams. This makes managing and maintaining Forms much quicker and easier.
Adding a Form to a Project
When you add Forms to a Project, they appear in the Project Forms group in the Form Library.
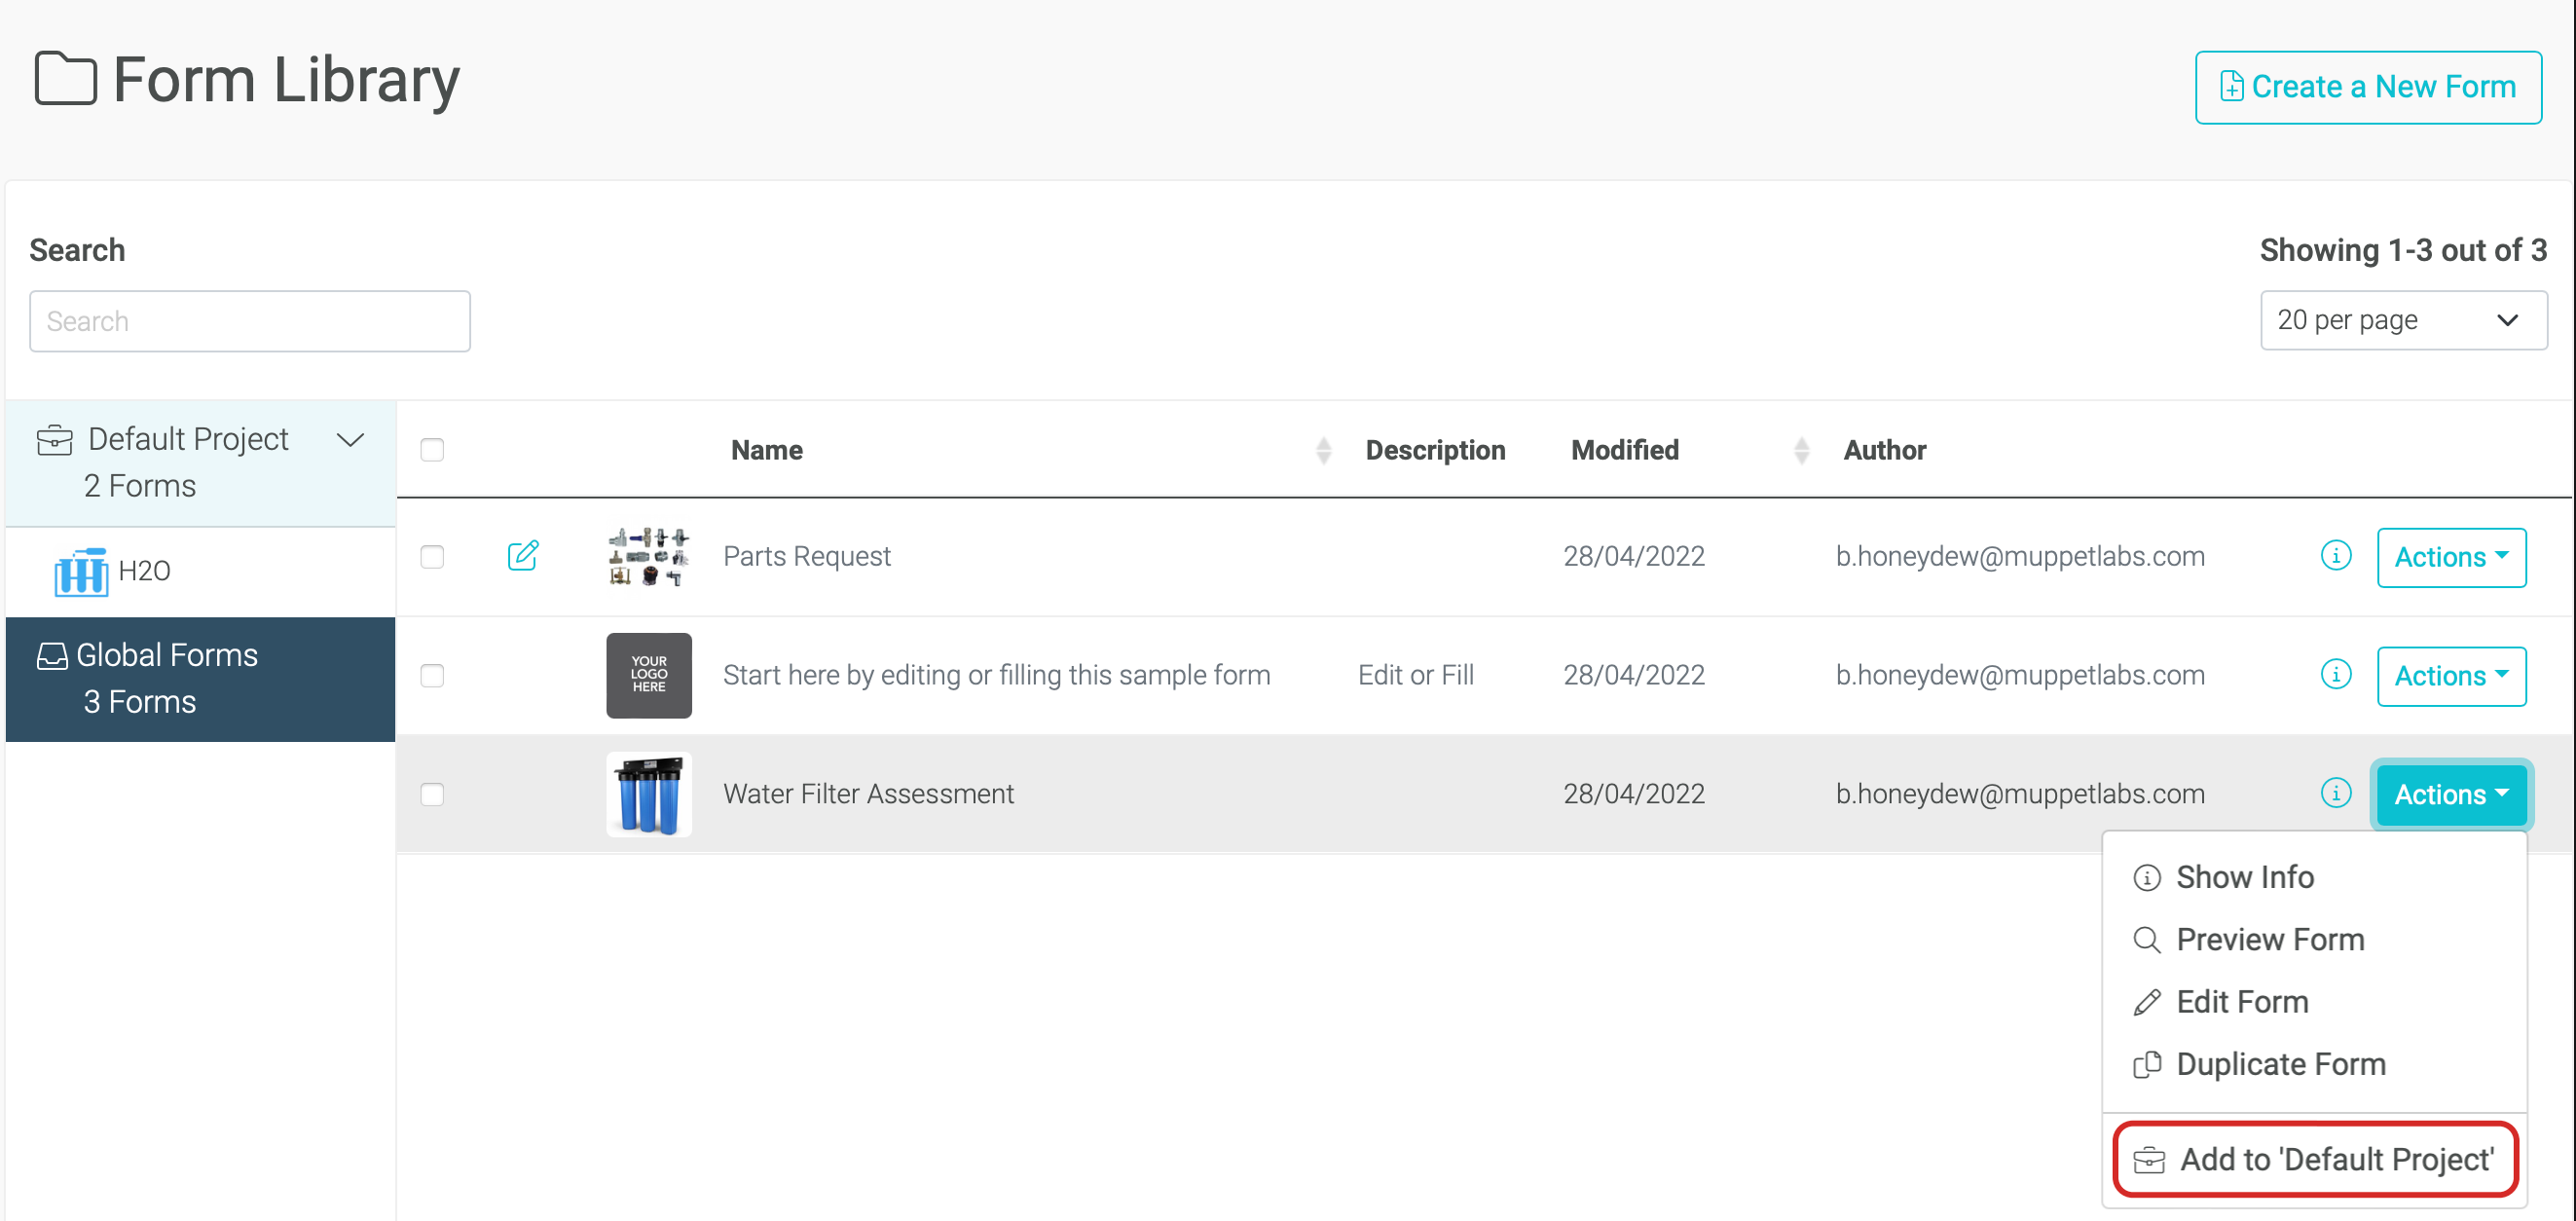
To add a Form to a Project:
- Select the Global Forms group
- Find the Form in the List
- Choose Add to 'Project Name' in the Actions Menu
The Form is now available for Project Admins to use in their Teams:
- By default Forms are locked - meaning that they can only be edited by an Account Admin
- It is possible to unlock a Form - allowing a Project Admin to make changes
This makes the following workflows possible:
- Project with a fixed set of Forms
- Account Admin adds a set of Forms to a Project
- Project doesn't allow new Forms to be created
- Project Admin can add/remove the Forms from their Teams as they choose
- Project with an editable set of Forms
- Account Admin adds a set of Forms to a Project
- The Forms are unlocked meaning the Project Admin can make changes
- Project doesn't allow new Forms to be created
- Project Admin can add/remove the Forms from their Teams as they choose
- Project Admin can add/remove the Forms from their Teams as they choose
- Project with an initial set of Forms
- Account Admin adds a set of Forms to a Project
- The initial Forms are locked, so they can't be changed
- Project allows new Forms to be created, so Project Admins can add their own
- Project Admin can add/remove the Forms from their Teams as they choose
- Completely locked-down Project
- Account Admin adds a set of Forms to a Project
- Account Admin adds the Forms to Teams in the Project
- No Project Admins are created, so changes can only be made by Account Admins
TIP
Check out Locking and Unlocking Forms to understand how locked Forms work.
Adding a Form to a Team
Before you can add a Form to a Team, it must first have been added to the Team's Project (see Adding a Form to a Project).
When you add Forms to a Team, they become available for filling in by the Team's Users.
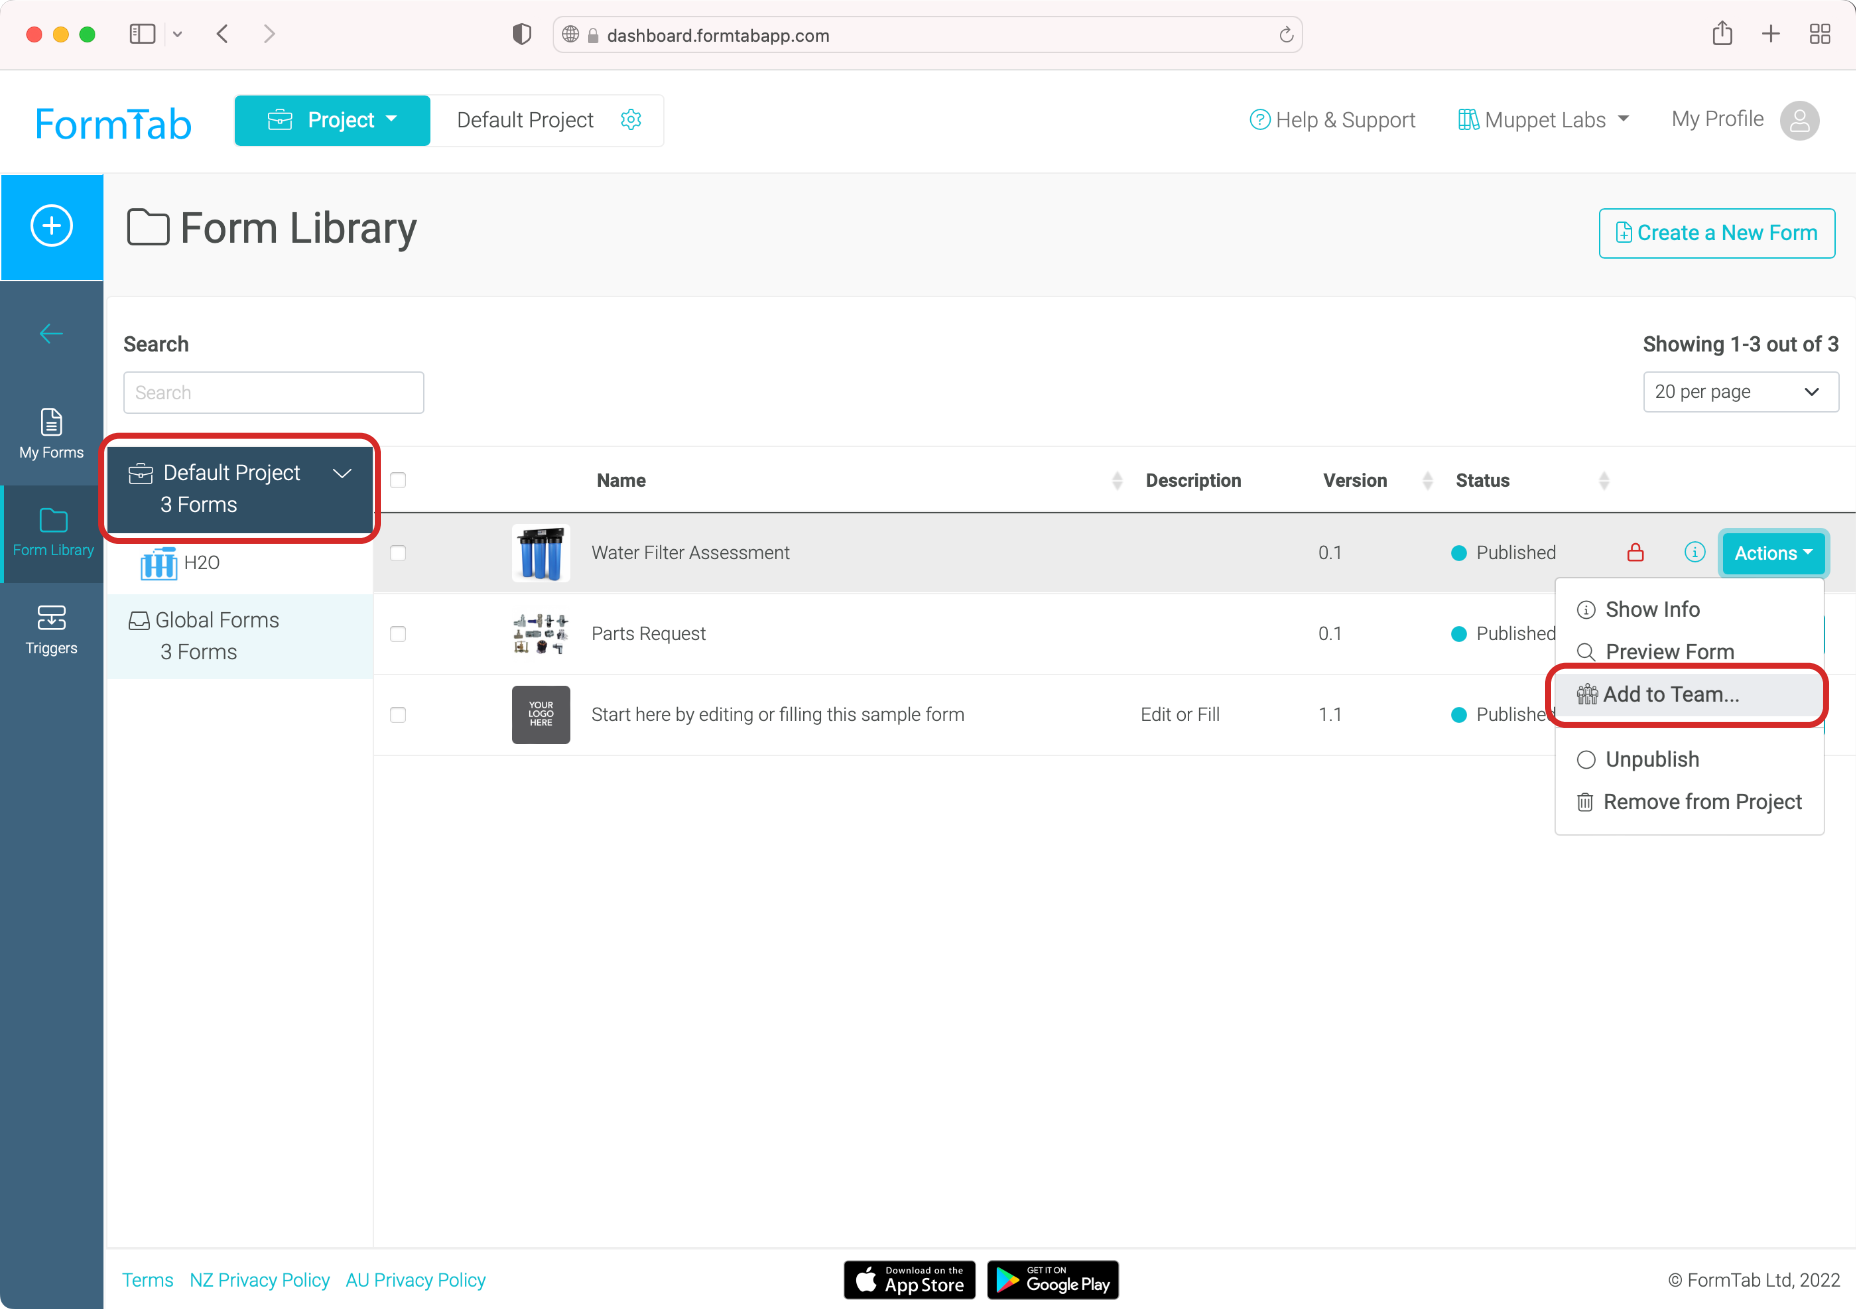
To add a Form to a Team:
- Select the Project Forms group
- Find the Form in the List
- Choose Add to Team...' in the Actions Menu
- A list of available Teams will appear

- Click the + next to a Team to add the Form
- The switch on the right sets the published status of the Form in that Team. Turn it on to publish the Form immediately
TIP
Check out Unpublishing a Form for when you no longer want a Form to be available.
Unpublishing a Form
When you no longer want a Form to be available to your Users for filling in, you have a few options:
- Unpublish from a Team The Form remains in the Team, but is disabled. It can be re-published at a later date
- Remove from a Team The Form is completely removed from the Team
- Unpublish from a Project The Form is disabled at the Project level. It will also be removed from any Teams it has been added to. You can re-publish at any time.
- Remove from a Project The Form is completely removed from the Project and any of its Teams
Unpublish from a Team
To unpublish a Form from a Team:
- Expand the Project Forms group and select the Team

- Find the Form in the List
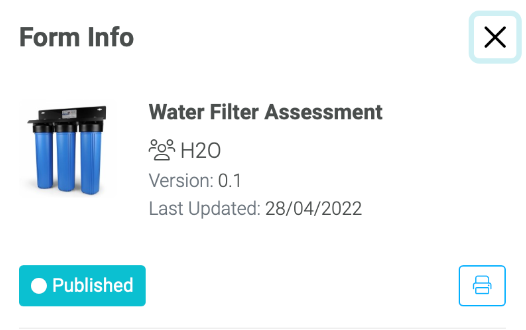
- Click the info (i) button to show the Form's Info
- Click the Published button to toggle the published status of the Form
Remove from a Team
To remove a Form from a Team:
- Expand the Project Forms group and select the Team

- Find the Form in the List
- Click the (-) button
Unpublish from a Project
To unpublish a Form from a Project:
- Select the Project Forms group
- Find the Form in the List
- Choose Unpublish' in the Actions Menu
Remove from a Project
To remove a Form from a Project:
- Select the Project Forms group
- Find the Form in the List
- Choose Remove from Project in the Actions Menu
Locking and Unlocking Forms
When a Form is added to a Project it is Locked by default, as indicated by the padlock icon when you view the Form in the Project Forms group.

- This means that the Form can't be edited by an Admin in this Project
- To make changes to this Form you need to be an Account Admin and view the Form in the Global Forms group
If you want to allow a Project Admin to edit this Form, you can unlock it:
- Select the Project Forms group
- Find the Form in the List
- Click the info button
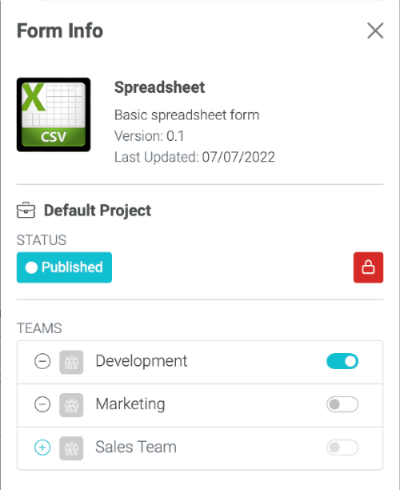
- Click the red padlock button and follow the onscreen prompts
The Form is now effectively owned by the Project:
- It no longer displays as locked in the Project Forms list
- It will now show as locked in the Global Forms list
- To make changes to this Form from now on, you need to select it from the Project Forms list
Note You can't unlock a Form if it is shared across multiple Projects. If the Form is being used in another Project, a copy will be created and this will be unlocked
Getting Info about a Form
You can view more information about a Form by clicking the info button in the Forms list.
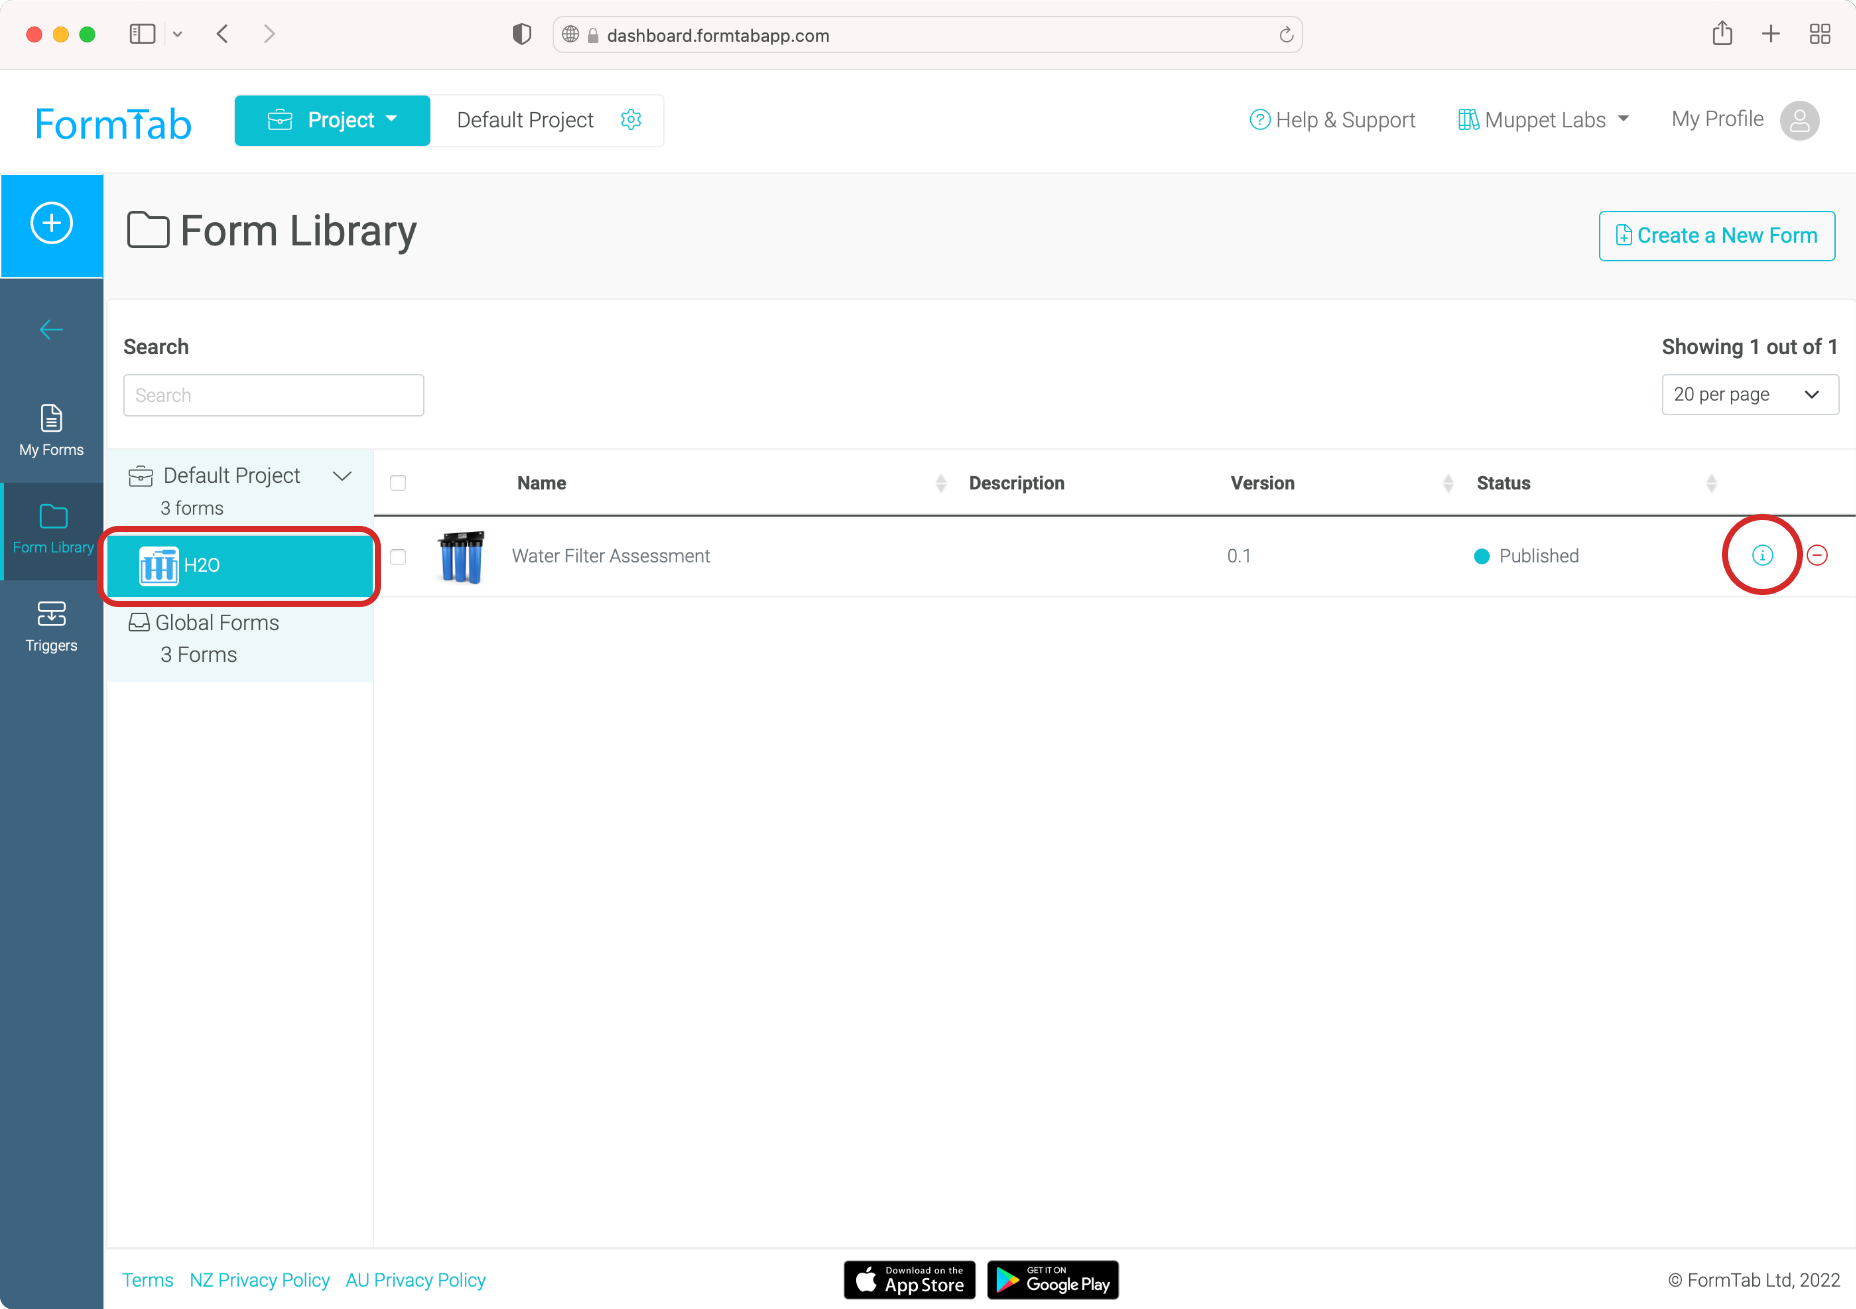
The information that displays in the info panel varies, depending on whether you are viewing the Global, Project or Team Form list
Global Form Info
If you display a Form's info from the Global Forms list:
Project Form Info
If you display a Form's info from the Project Forms list you will see:
- Form Name/Description
- Publish/Unpublish and Lock/Unlock toggle buttons
- A list of Teams showing published status

In this example, the Form has been added to the Development and Marketing teams and is published in the Development Team. You can modify these settings using the +/- buttons and the toggle switches.
Team Form Info
If you display a Form's info from the Team Forms list you will see a list of options specific to the Form in this Team:
- Form Name/Description
- Publish/Unpublish toggle button
- Send Options
- Quick Start Link
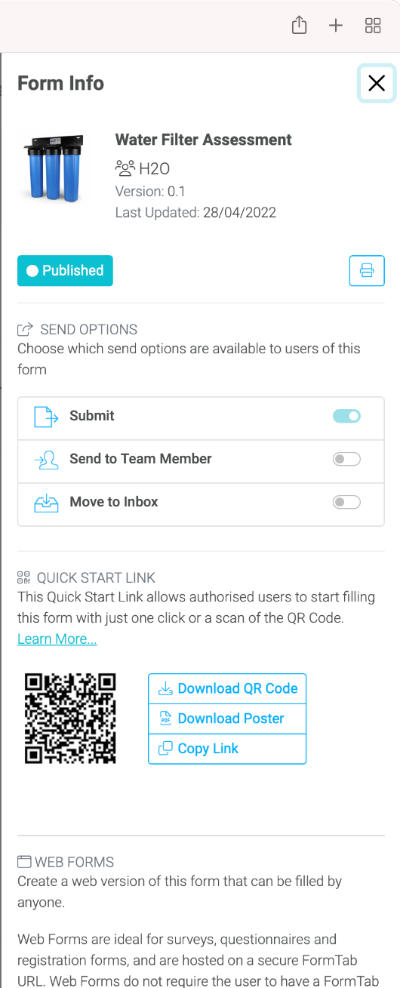
- Web Forms
Note Any changes you make here only apply to the Form in this Team.
